Now, we will see how we can get the Salesforce Record details using Apex Class – Wiring to Function mechanism. This mechanism is needed if you want to pre-process the data before going to the Lightning App.
To do this exercise, we will try to show a Contact Record in Lightning App.
Step 1: We have created an Apex Class named “LWC_ContactController” by which we will send the Contact record to Lightning Web Component. We can take the same Apex Class with the same method for this exercise as mentioned in the session “Apex Wire Method to Property”.
LWC_ContactController.cls
1 2 3 4 5 6 7 | public with sharing class LWC_ContactController{ @AuraEnabled(cacheable = true) public static List<Contact> getContactList(){ return [SELECT Id, Name, Email FROM Contact LIMIT 1]; } } |
getContactList() method of the Apex Class “LWC_ContactController” returns the Contact Record.
Step 2: After that, we have built a LWC named “showContactsWMF“. As per previous examples, we need to update the “showContactsWMF.js-meta.xml” file to set the visibility in Lightning App Builder.
showContactsWMF.js-meta.xml
1 2 3 4 5 6 7 8 9 10 | <?xml version="1.0" encoding="UTF-8"?> <LightningComponentBundle xmlns="http://soap.sforce.com/2006/04/metadata" fqn="showContactsWMF"> <apiVersion>45.0</apiVersion> <isExposed>true</isExposed> <targets> <target>lightning__AppPage</target> <target>lightning__RecordPage</target> <target>lightning__HomePage</target> </targets> </LightningComponentBundle> |
Step 3: Need to write the respective HTML file.
showContactsWMF.html
1 2 3 4 5 6 7 8 9 10 11 12 13 14 15 16 17 18 19 | <template> <lightning-card title="Apex Wire Method To Function"> <lightning-layout> <lightning-layout-item flexibility="auto" padding="around-small"> <template if:true={contacts}> <template for:each={contacts} for:item="contact"> <p key={contact.Id}> {contact.Name} <lightning-formatted-email value={contact.Email} class="slds-m-left_medium"></lightning-formatted-email> </p> </template> </template> <template if:true={error}> {error}> </template> </lightning-layout-item> </lightning-layout> </lightning-card> </template> |
Step 4: Now, we need to work on the JS file.
showContactsWMF.js
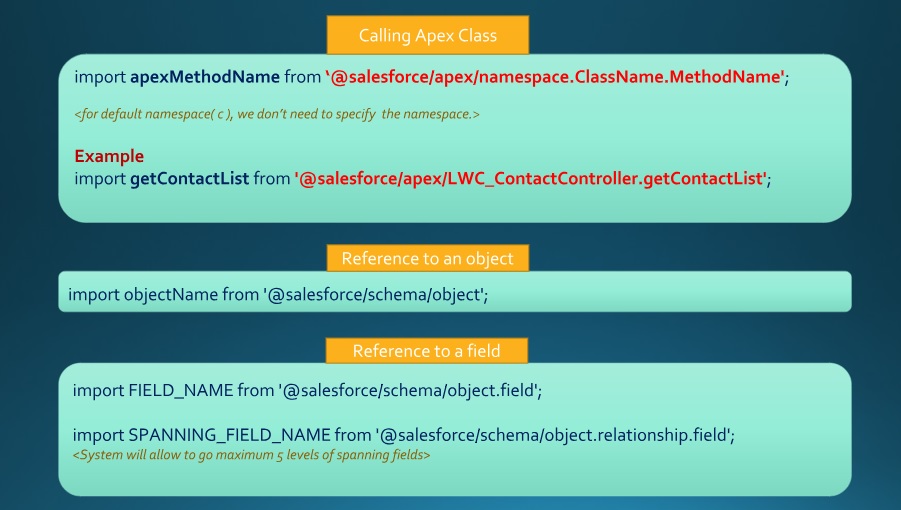
1 2 3 4 5 6 7 8 9 10 11 12 13 14 15 16 17 18 19 20 | import { LightningElement, wire, track } from 'lwc'; import getContactList from '@salesforce/apex/LWC_ContactController.getContactList'; export default class ShowContactsWMF extends LightningElement { @track contacts; @track error; @wire(getContactList) wiredContacts({data, error}){ if(data){ this.contacts = data; this.error = undefined; } else if (error) { this.error = error; this.contacts = undefined; } } } |
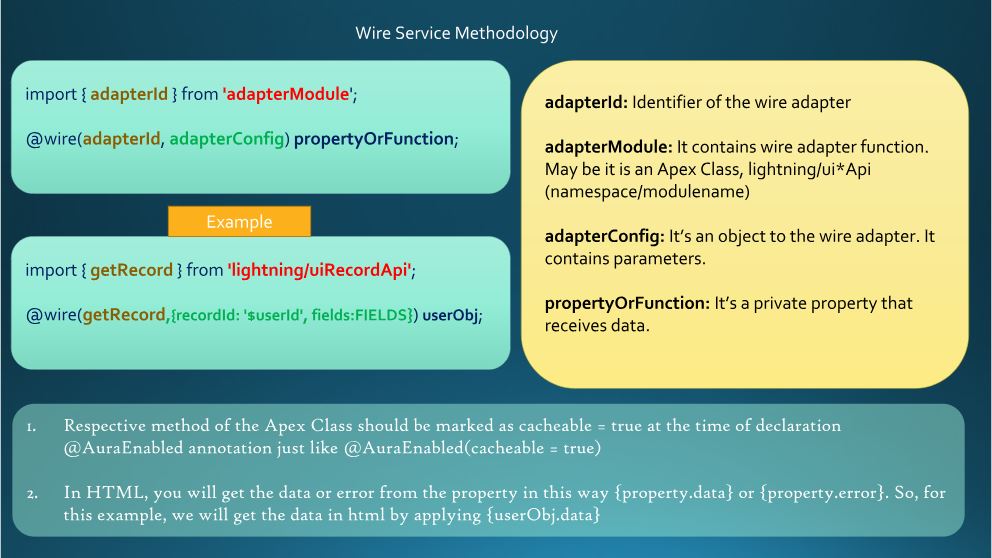
As per the wire method writing rules, first we have imported “getContactList” from the Apex Class, “LWC_ContactController“. Then, the function named wiredContacts is wired to getContactList in this way
@wire(getContactList)
wiredContacts({data, error}){ }
We have defined two private reactive properties such as contacts and error. We have set these two properties into the wired function named wiredContacts. Hence, we will get the Contact record details using only {contacts} instead of {contact.data} applied for wire method to property mechanism in HTML file. And obviously, we will get the errors using {error} in HTML file.
We have used wire mechanism so, the cacheable of the respective method, getContactList() of the Apex Class “LWC_ContactController” should be true.
Step 5: At last, need to add this LWC into Lightning App/Home or Record Page.
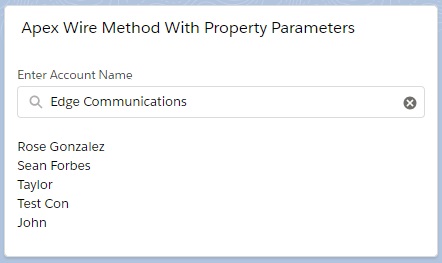
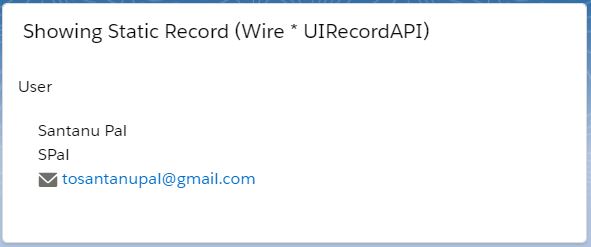
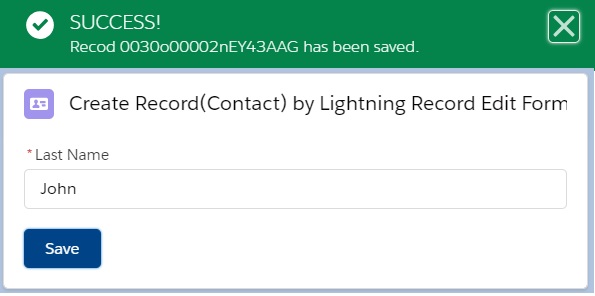
Result

10,144 total views, 6 views today