
In this session, we will learn how to develop a simple Node.JS application with express.js web application framework.
I thought before starting about Lightning Web Component Open Source, we need to learn about Node JS and other certain useful libraries. Let’s start:
Node JS was written by Sir Ryan Dahl in 2009 [wiki]. Node JS is not a programming language. It’s an open-source, cross-platform javascript run time environment that executes javascript code outside a web browser. Node JS supports event-driven architecture and also supports asynchronous I/O framework. Developers also can build server-side scripting by this Node JS. It’s built on the basis of Google’s V8 JavaScript engine.
Now, we will create a simple “Hello World” app which will be executed by server-side scripting.
So, please follow the mentioned steps.
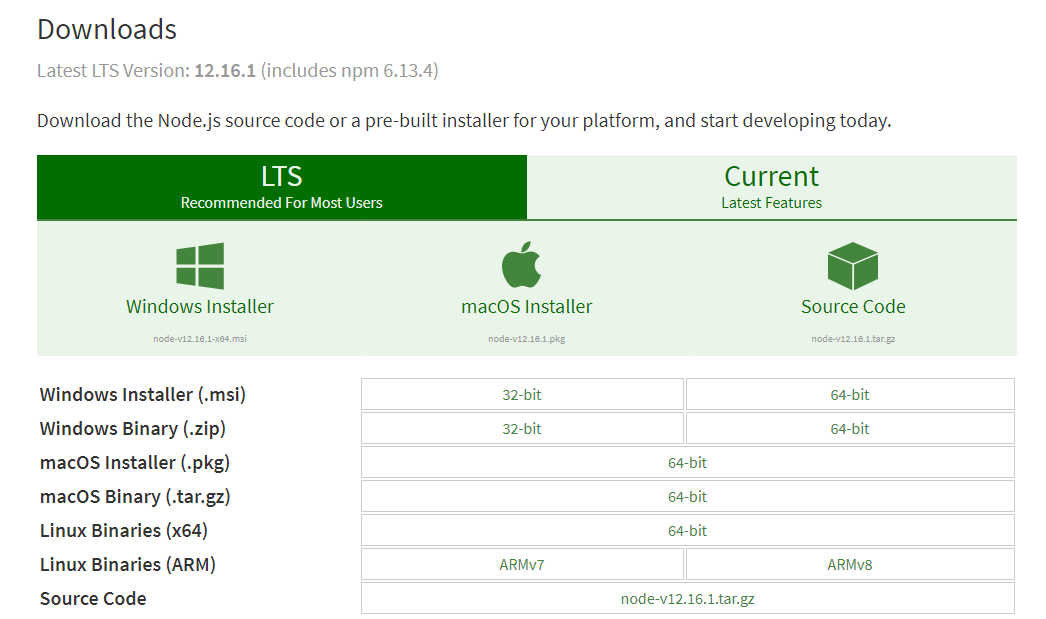
Step 1: Install Node.js. If you have not installed earlier, please install node.js from this link.
Step 2: Please set the environment variable for Node JS.
Step 3: Please check the version for node and npm from command prompt with the following syntax.
npm(Node Package Manager) which manages all the packages/extensions developed by node.js to install in your local repository.

Step 4: Create a new folder. Let’s say, I have created a new folder named “simple-node-app”.
Step 5: Now, we will create a project for the node using this initializing command from the command prompt of the same project directory.
npm init
It will ask you to provide the following information as per the following image. For now, just you can press enter to set the default for all the line items. After executing this command, it will create a package.json file and it will install all node js dependency frameworks/libraries into the node_modules folder.

Step 6: Now, open this folder “simple-node-app” from your VS Code.
Step 7: Now, we will install express js web application framework to execute server-side scripting and provide a response to the Client. Please execute the following command to install express js from the command prompt or from the terminal of the VS Code for this folder/project root directory.
npm install express
It will install express js framework in your node_modules folder of the project directory.
Step 8: Great, you have completed all the installation process. Now, it’s time to write the code.
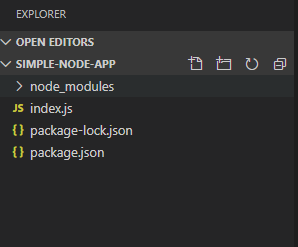
So, please create a js file named “index.js” in the same project directory. After creation of this file, your project directory looks like:
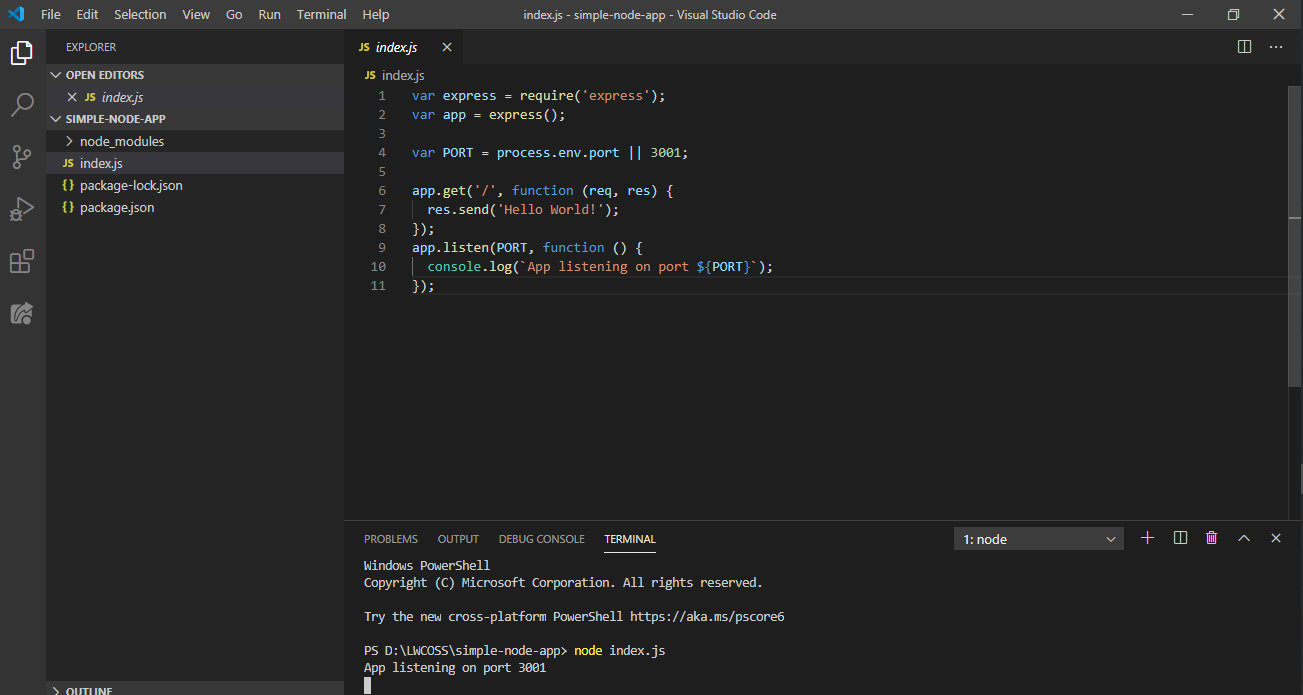
Step 9: Now, please write the following code snippets for index.js file.
var express = require('express');
var app = express();

var PORT = process.env.port || 3001;

app.get('/', function (req, res) {
  res.send('Hello World!');
});
app.listen(PORT, function () {
  console.log(`App listening on port ${PORT}`);
});
As per the code snippets, we have imported the express js library and define the port. process.env.port is required to run the application on any platform just like Heroku instead of only localhost.
After that, we have defined the application get feature to declare the “Hello world!” message to the client side/web browser. At last, we have set the application listening on the particular port using app.listen() method.
Step 10: Now, it’s time to execute. So, please run this following command node index.js from the command prompt or from the terminal of the VS Code. After some time, your first node application will be run on the localhost: http://locahost:3001
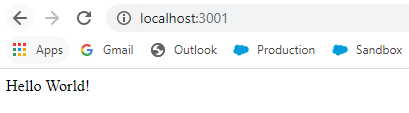
Output: When we will execute this URL: http://localhost:3001 from the browser, we will get “Hello World!” message in the browser,
Thanks for your time!!
![]()