
What is Jest?
Jest is a JavaScript Testing Framework for the client-side application using Node, Babel, React, TypeScript, Angular as well as Lightning Web Component and more. Jest is a JavaScript library and it is distributed as an NPM package.
We will learn how to use Jest to test our Lightning Web Component in the next chapter. Before that, we need to know the basic idea of Jest to test any JavaScript file. Let’s start:
Now, we will test our own sample js file which will return the “Hello World!” message.
Step 1: Let’s say, we have created one folder called “JestTest” where we will create the sample js file.
Step 2: We have created one sample js file named “helloWorld.js” which will return the message “Hello World!“.
function helloWorld(){
    return 'Hello World!';
}
module.exports = helloWorld;
Here, we have given provision to access this js function from other js files in the same folder using “module.exports” feature.
Step 3: Now, we have to install Jest library by running the following command in the terminal from the VS Code or from CLI. It will take little time to install. After successful installation, you can see the sub-folder named “node_modules” in your main directory/folder.
npm install --save-dev jest
Step 4: Till now, we didn’t get package.json file where we can derive the test commands. For that, we have to run the following command “npm init” from the terminal. It will ask so many questions about your project configuration. But, you can leave as it’s blank for now. After successful execution, you can see the package.json file has been created.
Step 5: So, in package.json file, we have to update the following commands:
"scripts": {
    "test": "jest"
 },
Jest Configuration is done. Excellent Job !!
Step 6: Now, we will create the test file. Naming Convention would be mainFileName.test.js. So, we have created a test file named “helloworld.test.js” to test our helloWorld function. In this file, we have imported our original “helloWorld.js” function by using require statement.
const helloWorld = require('./helloWorld');

describe('helloWorld', () => {
    it('displays message', () => {
        expect(helloWorld()).toBe('Hello World!');
    });
});
We can describe the blocks in this way:
- describe() block is nothing but a test suite. It can be used to test more business use cases.
- it() block defines the test block. A single it() block describes a single test. We can use test() block instead of it() block.
- expect() block is the assertion statement and it returns boolean variable depends on the matching between real value and expected value.
Step 7: Now, we will run the following command from the terminal of the VS Code to test our helloWorld function.
npm test
Result:
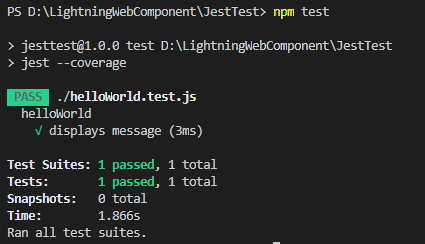
Here, we can see our test case is passed by matching “Hello World!” statement.
Step 8: If we want to see code coverage, we have to update the scripts in the package.json file.
"scripts": {
    "test": "jest --coverage"

  },
Step 9: Now, run the same Jest runner syntax from the terminal such as “npm test” just like Step 7.
Result:

Step 10: If you want to see the collective coverage report in HTML for all the js files in the same folder, you have to include the jest commands after scripts in your package.json file.
"jest": {
    "coverageReporters": ["html"]
  },
Now, the entire package.json file looks like
{
  "name": "jesttest",
  "version": "1.0.0",
  "description": "",
  "main": "helloWorld.js",
  "dependencies": {
    "jest": "^24.9.0"
  },
  "devDependencies": {},
  "scripts": {
    "test": "jest --coverage"

  },
  "jest": {
    "coverageReporters": ["html"]
  },
  "author": "",
  "license": "ISC"
}
Step 11: Again, we have to run “npm test” command and we will get one sub-folder called “coverage” in your main directory/folder named “JestTest“. In the Coverage folder, please run the “index.html” file to check the entire coverage report in HTML just like: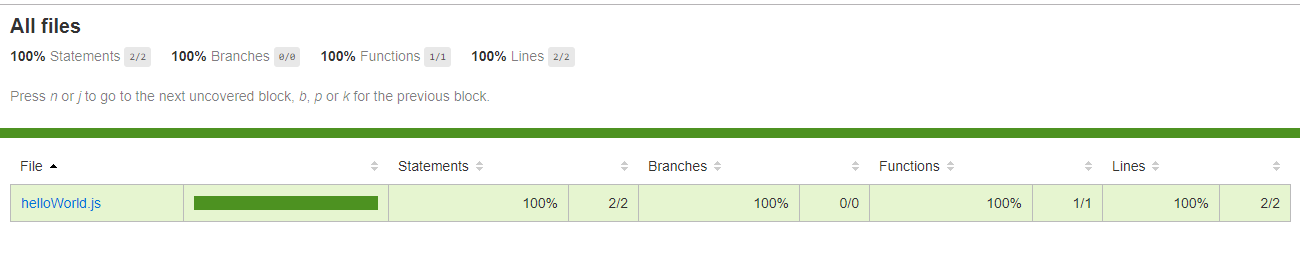
If you want to learn more about Jest, please read the reference document of Jest library from the following link: https://jestjs.io/
Enjoy! We have explored the fundamentals of Jest. In the next chapter, we will learn Jest for Lightning Web Component.
Thank you!
![]()